
Want to record a specific section on your computer screen without showing the full screen? Screencastify allows you to record from a browser tab, desktop, and, even allows the ability to have your webcam included in case you want to show your face. In this article, we'll focus on how to do all three.
Recording a browser tab:
- Click on the Screencastify extension icon found to the right of your search bar.

If you don't see the Screencastify icon there, simply click on the extensions icon instead, and click on the greyed out pin
  found next to Screencastify. This will make the Screencastify icon appear to the right of your search bar.
 - Once you've clicked on the Screencastify icon, a window will pop-up with the ability to choose if you'd like to record a Browser Tab, Desktop, or your Webcam Only.
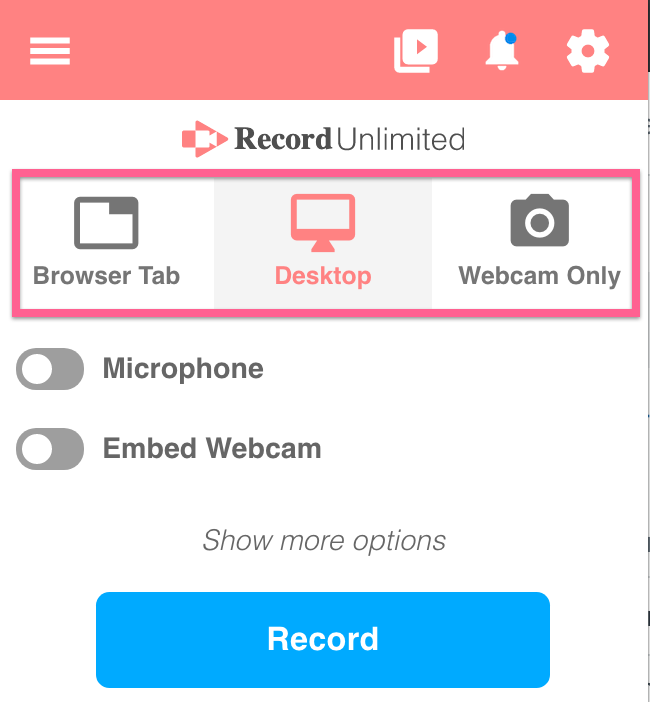
Choose the "Browser Tab" option if you want Screencastify to only record from the Browser Tab. Then, press Record.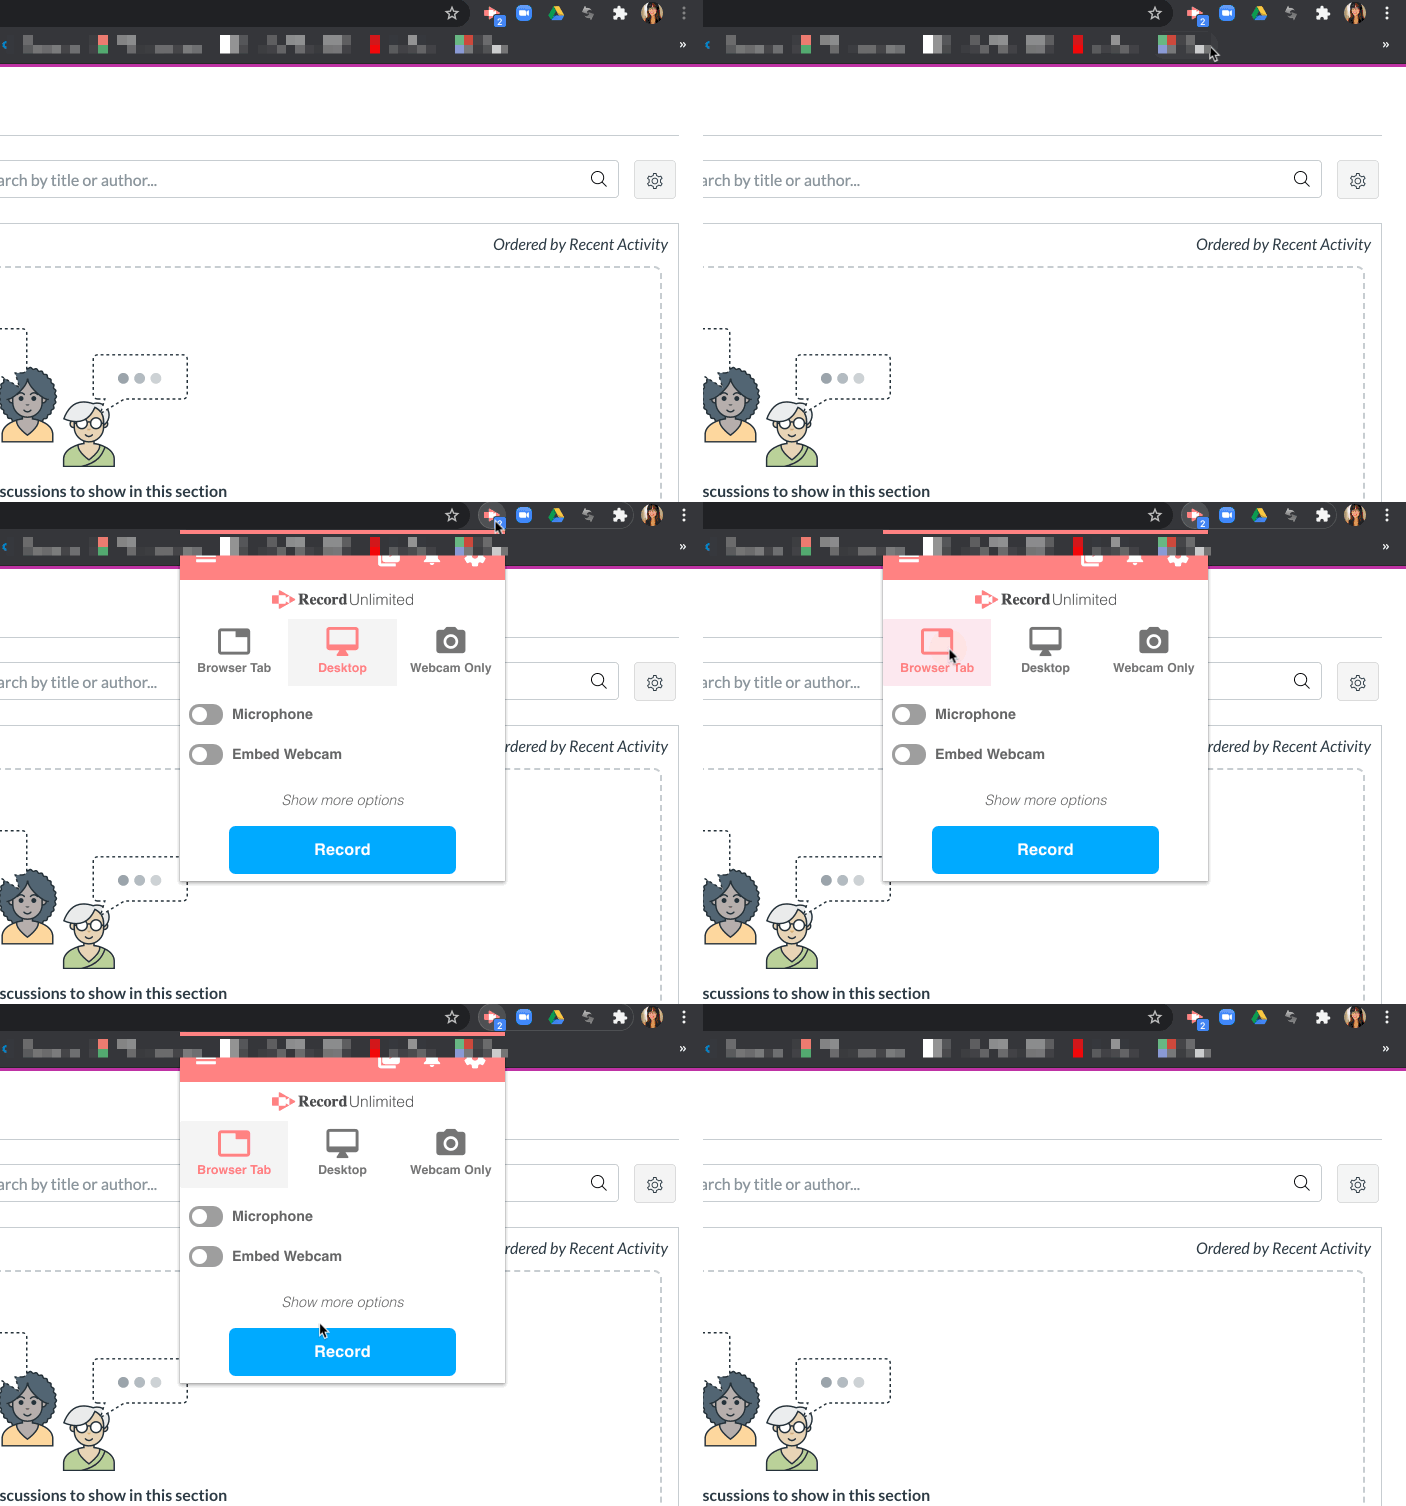
- Now, you can record what you wish specifically from that Browser Tab. If you were to switch tabs in that browser, Screencastify will only record from the original tab you started recording from.
Recording your desktop:
Recording your desktop from Screencastify follows the same first step from above. Once you've done that, click on "Desktop" and "Record" to start recording your entire screen.
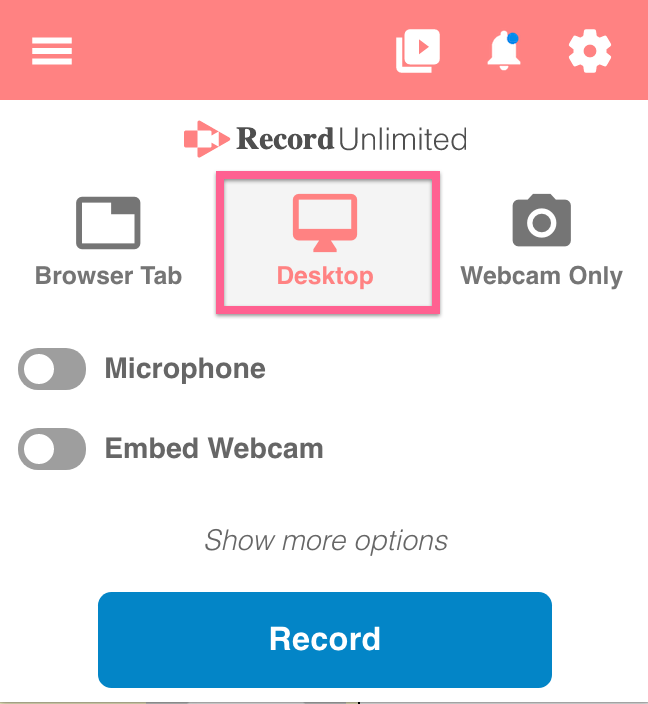
The difference between recording a browser tab to recording your desktop is that you can click anywhere on the desktop, and Screencastify will have it recorded. You can browse different tabs, click on different programs, and Screencastify will record it. Whereas recording only a browser tab will focus on that one browser tab, and nothing else.
Webcam:
Choosing to record from the Webcam only will allow you to record your face and voice. This is great to use for projects that require an explanation from you verbally, for class lessons, asking questions, and more!
- Choose the "Webcam" option in Screencastify.
- Select "Microphone" if you want to include your voice.
- Select your camera from the dropdown menu.
- Click on the blue "Record" button!

And that's all there is to it!
If you have further questions, don't hesitate to contact our support:
How do I get technical support?
Comments
0 comments
Article is closed for comments.